It used to be, people sewed their own clothes to save money. But now a pattern can cost more than a skirt on sale. Then add the cost of fabric, buttons, thread, facing, zippers, elastic, or anything else you might need. But even if sewing isn't a money-saver, I find it almost therapeutic, and I like to see what I can "create."
Recently, I have been on a re-make kick. Yesterday, I re-made a high-low skirt from Target. I just cut off the "low" and hemmed the edge. Ta-da. Now I have a normal skirt. I can't figure out why high-low skirts even exist. But that's just me.
Today's project also starts with a finished garment.
This is, step by step, how I made a dress from a large men's button up shirt. You can probably find one at the thrift store, Walmart, or your grampa's closet. I got mine on clearance at TJ Maxx. The length of the shirt will dictate the length of the finished dress. I wanted mine to hit just above the knee so I ended up with a size 3XLT. Who knew there even was such a size? If you wanted a shorter dress, or were making a dress for a child, you could obviously start with a much smaller shirt.
Disclaimer: All these pictures were taken in my basement (that's where the sewing machine is!) and the lighting is TERRIBLE. Therefore the pictures are TERRIBLE. My sincerest apologies. In the pictures, the color of the shirt seems to range from gray to blue to navy, but I assure you, all are the same shirt being made into the same dress. And it's blue.
First I spread my shirt out and cut off the sides, starting from where the sleeve meets the front, right at the shoulder, and cut straight down to the hem. I did this to both sides.
Then I used a tank top to get a basic sense of how deep I wanted the arm holes, neck, and back. I decided on the scoop of the neck based on where I wanted the top button of my dress to end up. I would say: be conservative when cutting. Once you have an idea of where you want the arm holes to be, you can drape the "shirt" over you, check the arm hole openings, and how low the front is, and make adjustments. I planned on wearing a t-shirt under mine but I still didn't want the arm holes to gape.
I opted to take off the breast pocket because I wasn't exactly sure where it was going to end up. I also hoped doing so would make it look a little less like a men's shirt. You could certainly leave it on, if you'd rather.
Once I was happy with the size and alignment of the openings, it was time to head to the sewing machine. The other supplies I needed were: matching lace hem tape and thread.
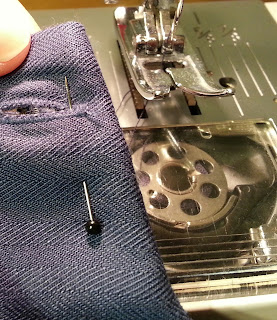
I pinned the hem tape to the right side edges of the sleeve and neck openings and sewed it on using a 1/4 inch seam allowance.
It looked like this.
Next, I top stitched all the edges, again using a 1/4 inch guide.
The raw edges of the fabric are now neatly inside.
Because of the placement of my top button and button hole, I needed to do a little hand sewing on these edges.
Next, I draped the "dress" over me to decide the pocket placement. I pinned each pocket edge on the right side of the dress, both on the front sides, as well as the back sides. Then sewed each piece of the pocket in place, again with 1/4 inch seam allowances.
And pressed the edges, like my momma taught me.
Then I lined my dress up with right sides together (inside out) and pinned the side seam edges. If you're like me and eye-ball everything rather than measure, you may have to trim your pockets a little to get both the front and back to line up evenly.
 |
| Thankfully, I can sew straighter than I can draw... |
My pocket placement may seem a little low but 1. I want to be able to wear a belt with my dress and not have the pockets all bunched up and unusable, and 2. I have ridiculously long arms. I sewed the side seam edges, again with a 1/4 inch seam allowance.
Then I tried on my dress. I am, ahem, small on top, so I decided I needed to take it in a little under the arm pits. Like ... about 5 inches.
So with right sides still together, I measured 2.5 inches from the edge of the side seam, right at the armpit. And marked it with chalk.
Then I used a ruler and drew a straight line from that chalk mark to the start of the pocket.
Once the seams were sewn, I trimmed off the triangles of fabric. As you can tell from the pictures, the edges are already fraying so I ran a zigzag stitch along all my side seam edges to hopefully minimize future fraying.
Done.
It's already hemmed. The button holes and buttons are already there.
Quickest dress ever.
The cost of this project:
- shirt $8.99
- one pkg lace hem tape $1.20
- (I already had the thread)
- about 1.75 hours
Easy peasy.

.jpg)


